Rosogulla (Bengali Milk Balls in Syrup)
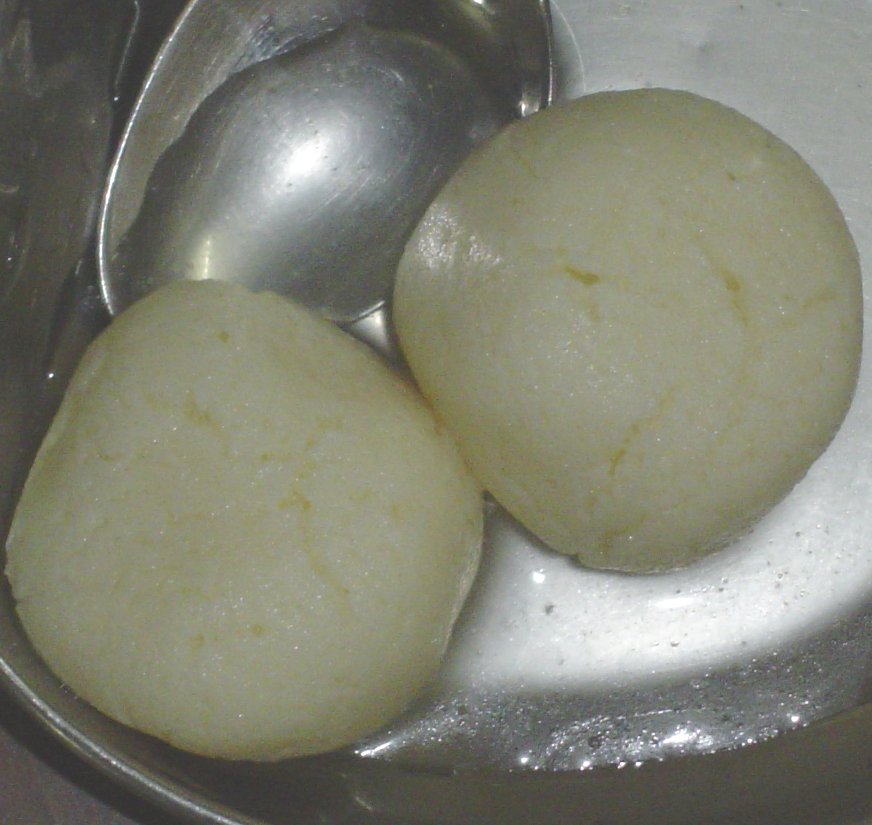
Rasgulla is a milk-based Bengali sweet, popular in West Bengal, India.
- Prep
- 56 min
- Cook
- 2 hr 10 min
- Total
- 3 hr 6 min
- Servings
- As written in source
- Difficulty
- Advanced
Timings are approximate — worked out from the method, not measured in a test kitchen.
Ingredients
Quantities are retained as written by the source and do not scale automatically. Tap an ingredient to check it off as you go.
Cooking instructions
Procedure
Dissolve the citric acid in the water, and set aside.
Procedure
Bring the milk to a boil in a saucepan, stirring continuously.
Procedure
Remove from the fire and stir for 5–7 minutes until the milk is slightly cool.
Procedure
Add the citric acid solution and stir the milk gently.
Procedure
The milk mill curdle and the whey will separate. The whey has to be clear thus indicating the milk has completely curdled. Allow it to rest for 3–4 minutes.
Procedure
Strain out all the whey using a clean damp muslin cloth.
Procedure
Fold all the 4 sides of the muslin cloth and twirl it gently so that all the whey that is in the milk solids gets evenly drained out.
Procedure
Gather the cloth from all 4 sides and squeeze the chenna lightly about 3 to 4 times so that most of the whey gets drained out.
Procedure
Remove the chenna onto a clean plate and knead gently so that it is free of lumps, taking care not to apply too much pressure while kneading the chenna.
Procedure
It is advisable to use this almost immediately.
Procedure
Combine the sugar, milk, and water in a large pan about 200 mm (8 inches) in diameter and 150 mm (6 inches) in height. Heat while stirring continuously until the sugar dissolves.
Procedure
When the syrup comes to a boil, the impurities in the sugar will begin to float on the surface, forming a grey layer. Do not stir at this point as the layer will break and it will not clarify the syrup.
Procedure
After about 5 minutes, slowly drizzle 1 cup of water form the sides of the pan with the help of a ladle. Water added at this stage will bring down the temperature of the sugar syrup and will not allow it to boil and break the grey layer.
Procedure
Continue to simmer the syrup over a medium flame for about 10 minutes and then gently remove the grey layer using a slotted spoon.
Procedure
Bring the syrup to the boil once again and then slowly drizzle another cup of water from the sides of the pan using a ladle. remove all the remaining impurities from the syrup, again using a slotted spoon.
Procedure
Increase the flame and boil vigorously for 1–2 minutes. Set aside.
Procedure
Divide the chenna into 16 equals parts, and roll each part into a ball, taking care to see that the there are no cracks on the surface
Procedure
Dust the back of a flat plate (thali) lightly with the flour and place the rolled chenna balls on it.
Procedure
Mix 2 tsp of the plain flour with ¾ cup of water to make a flour solution. Keep aside.
Procedure
Heat the sugar syrup in a deep pan over a high flame and allow it to boil vigorously.
Procedure
When it boils, sprinkle half the flour solution in the sugar syrup. When the flour solution is added, a frothy layer is formed on the surface of the syrup.
Procedure
Add the chenna balls by upturning the plate on which they are kept. Do not touch the chenna balls at this point as they are fragile.
Procedure
If the frothy layer begins to subside, sprinkle the remaining half portion of the flour solution.
Procedure
After this, keep on sprinkling water (minimum 1 cup) on the surface of the sugar syurp. Ensure that the syrup froths all the time while cooking the rasgullas.
Procedure
Cook for about 15 minutes, continuously sprinkling water to enable the froth to form.
Procedure
Check if the rasgullas are cooked. This is determined by touch. If the rasgulla springs back and retains its shape when pressed, it is cooked. Another way of checking is to drop a rasgulla in a pan of cold water. If it sinks to the bottom, it is cooked.
Procedure
Remove form the fire.
Procedure
Transfer the rasgullas to a bowl along with 2 ladles of sugar syrup and 1 cup of water.
Procedure
Cool and chill for about 3 to 4 hours before serving.
Notes, tips, and variations
Rasgullas should always be cooked on a very high flame.
Notes, tips, and variations
While cooking rasgullas, the sugar syrup must froth continuously.
Notes, tips, and variations
The sugar syrup should fill about ⅓ of the pan.
Notes, tips, and variations
While making rasgulla shapes (see variation below), always ensure that there are no cracks on the surface of the shapes.
Notes, tips, and variations
While cooking, rasgullas expand to at least 4 times their original size.
Notes, tips, and variations
While sprinkling water on the syrup when the rasgullas are cooking, make sure you sprinkle a little water at a time (about 1 teaspoon at a time using your hands) and not large quantities.
Notes, tips, and variations
The cooking time of the rasgullas will vary depending on their size. Large shapes will need more cooking time and versa.
Photo: No machine-readable author provided. Pamri assumed (based on copy · Public domain · · Photo source and licence
Wikibooks contributors · CC BY-SA 4.0 · https://creativecommons.org/licenses/by-sa/4.0/ · Adapted; quantities retained as written. · Original source
Read it through first
Skim all 36 steps before you start — it is the difference between cooking and firefighting.
Scale it
Use the quantities listed in the original recipe. Adjust them manually if making a different batch size.
Storage
Cool completely, then keep in an airtight container in the fridge for up to three days.
Reheating
Reheat gently with a splash of water in a covered pan, rather than blasting it, so nothing dries out.
Approximate values per serving. Worked out from the ingredient list — treat them as a guide, not a measurement.
Reviews
No reviews yet. If you cook this, come back and tell everyone how it went.