Blackberry Oat Bars (Gluten-Free)
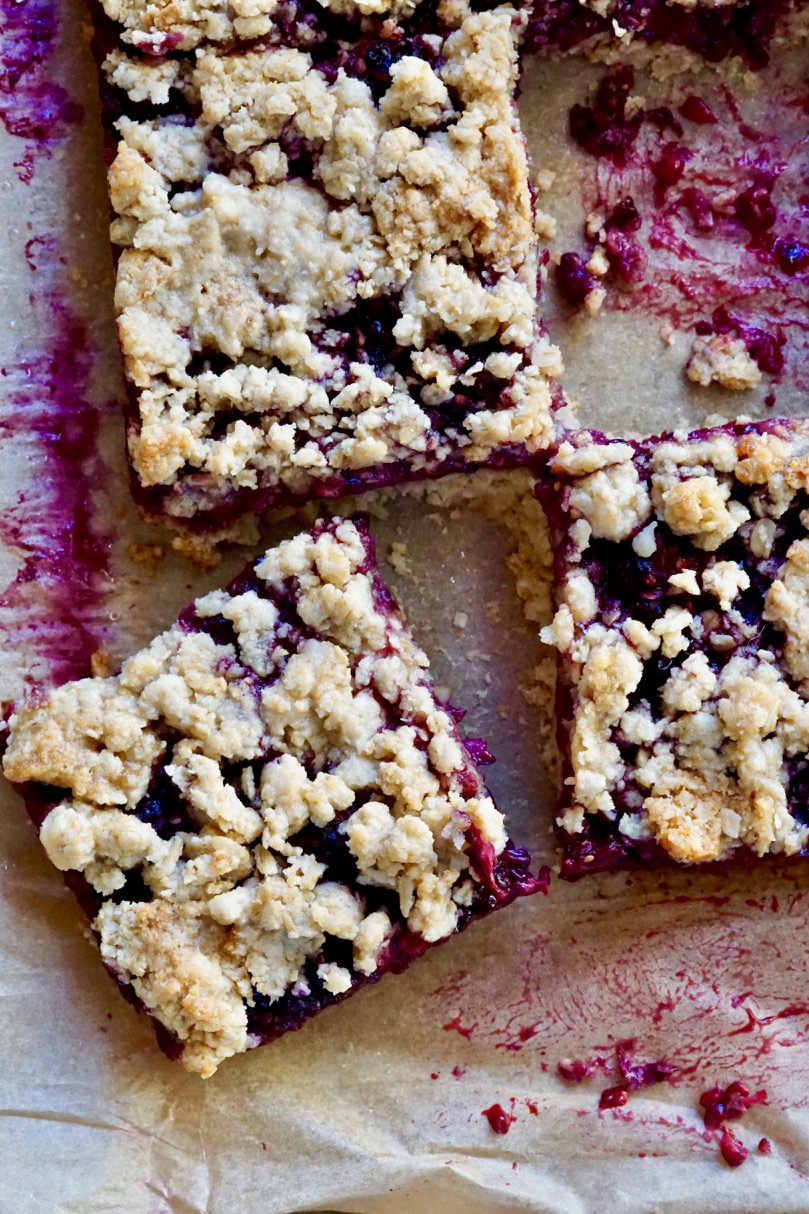
Gluten-free, vegan-friendly blackberry oat bars that could be breakfast Monday morning.
- Prep
- 17 min
- Cook
- 40 min
- Total
- 57 min
- Servings
- As written in source
- Difficulty
- Medium
Timings are approximate — worked out from the method, not measured in a test kitchen.
Ingredients
Quantities are retained as written by the source and do not scale automatically. Tap an ingredient to check it off as you go.
Cooking instructions
Preparation
Preheat the oven to 350 °F. Line a 9×9-inch baking pan with parchment paper and set aside. The easiest way to do this is to cut two strips of parchment paper and criss-cross them in the pan.
Preparation
In a food processor fitted with the blade attachment, add the oats, almond flour and salt. Blend well.
Preparation
Add the melted coconut oil, brown sugar, honey, vanilla, cinnamon, and almond butter. Pulse to blend.
Preparation
Place ⅔ of the oat mixture in the prepared baking pan. Reserve the remaining ⅓ for the crumble topping. Using your hands, press firming to form a bottom crust layer. Lightly prick the dough with a fork paring knife to prevent bubbling. Place in the oven and pre-bake for 10 minutes to set.
Preparation
While the crust is baking, place the blackberries and sugar in a food processor and pulse to rough chop the berries and incorporate the sugar.
Preparation
Remove the baking pan from the oven and evenly spread the blackberry filling on top. Sprinkle the remaining crumble topping on top of the blackberries. Place back in the oven and bake for an additional 25 minutes or until slightly golden.
Preparation
Allow to cool completely before slicing.
Photo: Simmer + Sauce · CC BY 3.0 · https://creativecommons.org/licenses/by/3.0 · Photo source and licence
Wikibooks contributors · CC BY-SA 4.0 · https://creativecommons.org/licenses/by-sa/4.0/ · Adapted; quantities retained as written. · Original source
Read it through first
Skim all 7 steps before you start — it is the difference between cooking and firefighting.
Scale it
Use the quantities listed in the original recipe. Adjust them manually if making a different batch size.
Storage
Cool completely, then keep in an airtight container in the fridge for up to three days.
Reheating
Reheat gently with a splash of water in a covered pan, rather than blasting it, so nothing dries out.
Approximate values per serving. Worked out from the ingredient list — treat them as a guide, not a measurement.
Reviews
No reviews yet. If you cook this, come back and tell everyone how it went.