Basic Omelet
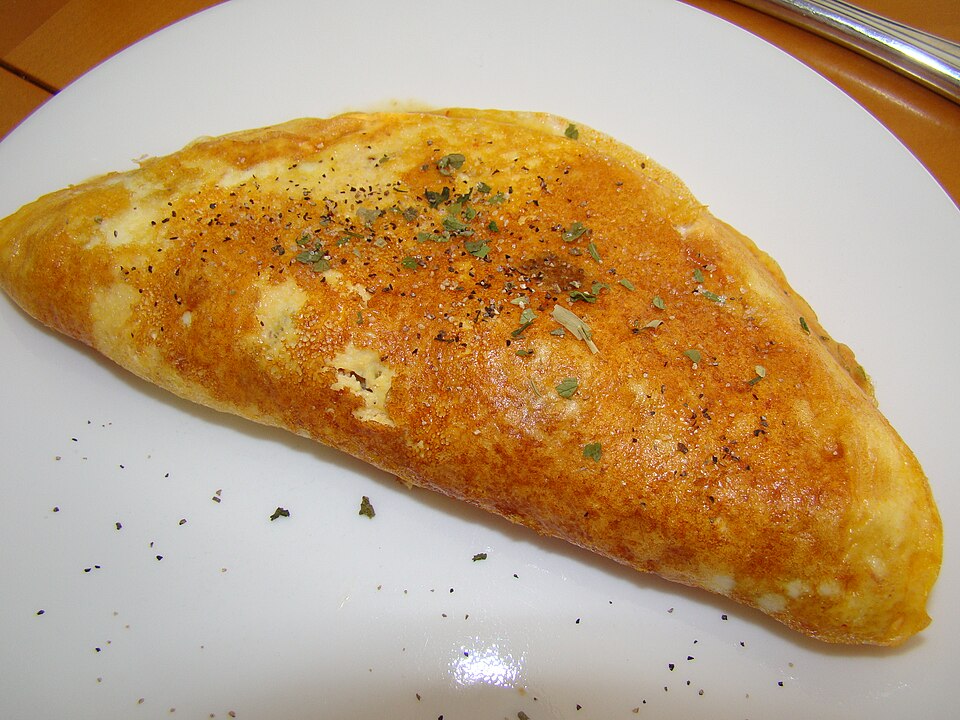
An omelet or omelette is a breakfast food consisting of an egg-based wrapper around a filling of your choice. Omelettes take little time to complete. Always ensure your fillings are either pre-cooked, able to be finished in the time available, or edible when raw but warmed.
- Prep
- 30 min
- Cook
- 1 hr 57 min
- Total
- 2 hr 27 min
- Servings
- As written in source
- Difficulty
- Advanced
Timings are approximate — worked out from the method, not measured in a test kitchen.
Ingredients
Quantities are retained as written by the source and do not scale automatically. Tap an ingredient to check it off as you go.
Cooking instructions
Procedure
An omelette can be served folded in half or thirds.
Procedure
Chop up the filling.
Procedure
Mix the eggs well. You may add milk to thin them (up to 1 Tbsp for each egg).
Procedure
Pour the eggs into a cool (i.e. room temperature) frying pan.
Procedure
Heat the pan, stirring constantly.
Procedure
Stop stirring as soon as solid egg begins to form.
Procedure
As the egg solidifies, pry it loose around the edges.
Procedure
If you didn't stir enough earlier, you may have difficulty solidifying the egg on top. In this case, you may pry up an edge while tilting the pan to let liquid egg flow under the solid egg. It is best to avoid this problem though.
Procedure
Keep loosening the egg from the edges until you can slide it around.
Procedure
Now you need to flip the egg without ripping it. If you have a very wide turner (or two smaller ones), you can use that. Otherwise, you'll have to flip the egg in the air. To do so, rapidly move the pan away from you then up, back toward you a bit, and then very rapidly downward. Catch the egg in the pan.
Procedure
Place filling on the egg.
Procedure
When the egg is done, wrap it around the filling. Serve.
Procedure
Chop up the filling.
Procedure
Mix the eggs well. You may add milk or cream to thin them.
Procedure
Heat your griddle (you're doing this without a pan, on the cooktop).
Procedure
Pour the eggs onto the griddle, using a spiral motion to spread them wide and thin.
Procedure
When the egg has set, gently add fillings on top.
Procedure
Using a large (3 x 12-inch, or 75 x 300 mm) turner, fold the egg over the filling.
Procedure
When you think the bottom has cooked, flip the omelette over to cook the other side.
Notes, tips, and variations
Before non-stick coating became common, many cooks would keep a special omelette pan which would not be used for any other purpose. It is important to use a very clean pan, especially if it is not a "non-stick" pan. If keeping a pan solely for omelettes, after cooking, wipe well with a clean cloth or paper-towel and then apply a thin coating of clean vegetable oil.
Notes, tips, and variations
You can use 3 eggs and a dash of milk or cream instead of the 2 eggs and 2 egg whites.
Notes, tips, and variations
Try frying the omelette in butter.
Notes, tips, and variations
After folding the omelette, you can top with grated cheddar and place frying pan under a grill until the cheese begins to brown.
Notes, tips, and variations
You can garnish with cream cheese, sour cream, or other thickened dairy product along with a fragrant sprig of a fresh herb or edible flower.
Notes, tips, and variations
Try frying the omelet in excess oil and butter (covering the top).
Notes, tips, and variations
Put the entire frying pan under a pre-heated grill to melt cheese before folding, and make the top go golden.
Notes, tips, and variations
To increase protein content, one can add additional egg whites (which are mostly protein) separating out the egg yolk (which has a grams of fat to protein ratio of 1:1)
Notes, tips, and variations
Cottage cheese or quark are possible high-protein alternatives to cheese as fillings.
Photo: Stripey the crab · CC BY-SA 3.0 · https://creativecommons.org/licenses/by-sa/3.0 · Photo source and licence
Wikibooks contributors · CC BY-SA 4.0 · https://creativecommons.org/licenses/by-sa/4.0/ · Adapted; quantities retained as written. · Original source
Read it through first
Skim all 28 steps before you start — it is the difference between cooking and firefighting.
Scale it
Use the quantities listed in the original recipe. Adjust them manually if making a different batch size.
Storage
Cool completely, then keep in an airtight container in the fridge for up to three days.
Reheating
Reheat gently with a splash of water in a covered pan, rather than blasting it, so nothing dries out.
Nutrition information is not available for this recipe yet.
Reviews
No reviews yet. If you cook this, come back and tell everyone how it went.